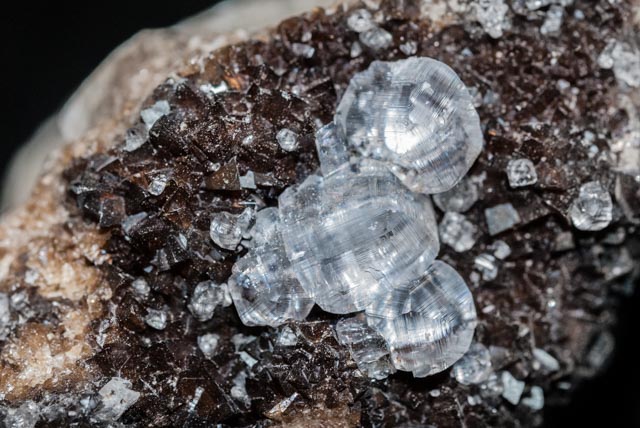
Rock collections are popular with travelers, both for academic reasons and for fun. A friend of mine recently showed me her collection. She had some amazing specimens, with delicate detail and cold beauty. When seen through a macro lens, it was like viewing an alien world. We spent all afternoon taking pictures.
A lot of other people have similar collections they’d like to share, but may not know how. Here are a some tips for taking better rock shots.
Bonus: the same tips work with most jewelry.
Prep Work
- Clean your rock as much as you can. A dusty rock dilutes the strange nature of the rock, making it look more everyday.
- Find a nice flat surface.
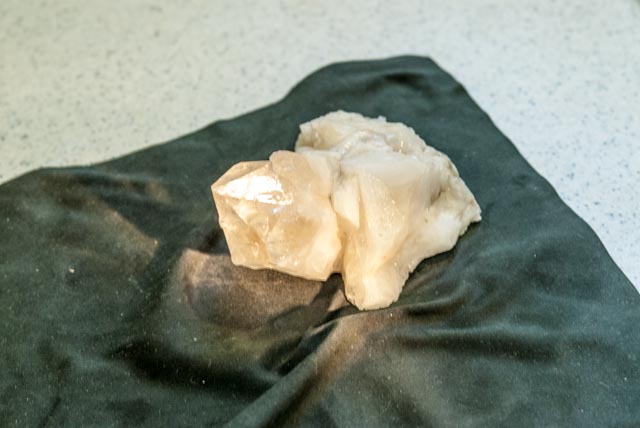
- Find a black cloth (as shown). Make sure it isn’t too reflective, textured or faded. It needs to be big enough to hide the background. In some cases a scarf, thin towel, or fleece will work.
- You don’t need a tripod, unless you’ll be focus stacking later. You may also be able to use a table, or book, for stabilization.
- Get your rock slightly wet immediately before you take the picture with a damp cloth. Nothing brings out the color and beauty of a rock like water. Problem areas may also vanish when wet.
- Try to find a place with good natural light instead of using the flash. Rocks are natural objects, so photographing them in natural light makes sense.
- Make sure you have a small fill light. The hard lines of a rock can cast harsh shadows, blocking details in your image. It doesn’t have to be a pro-level light kit. Light from a white iPad/phone screen may be enough. You’re taking pictures of small things, so a small light usually works well. Put the fill light on the dark side of your moon rock (see what I did there). For most of these shots I had someone holding an ipad with a blank white screen (app) nearby and that worked pretty well.
Shooting
- Take lots of pictures from lots of angles, keeping the black cloth in the background at all times.
- Move the rock. Rotate it. Flip it. Sounds silly, but once it is on the cloth people forget you can do that.
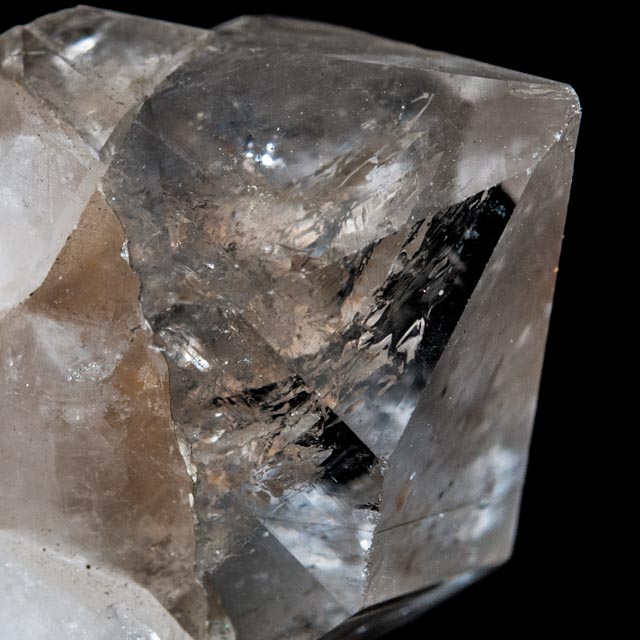
- Take pictures of the uninteresting bits. Sometimes you can’t see an amazing artifact in the rock until you see the image later on your computer screen.
- If you are using a point and shoot camera, set the camera to “flower” mode, close-up mode, macro mode, or at least portrait mode.
- If you are using a DSLR, I recommend a fixed/prime lens. I used a macro lens for most of these image, which allowed me to get slightly closer.
- Find out what the least distance possible between your lens and the object while keeping the object in focus. Shoot there.
- It is ok to have only part of the rock in focus. Just make sure it is an interesting part.